


Google Auth Integration
Legacy integration. New connections use the Google card instead: selecting Google Auth in Reflex Build opens it. This page is for projects that already have a Google Auth connection.
The Google Auth Integration allows your app to authenticate users using their Google accounts. This provides a secure, familiar login experience and simplifies user management.
Step 1: Create a Google OAuth Client
1 - Go to the Google Cloud Console
2 - Open Google Auth Platform → Clients. If you have not configured it for this project yet, click Get started and complete the app setup first.
3 - Click Create client

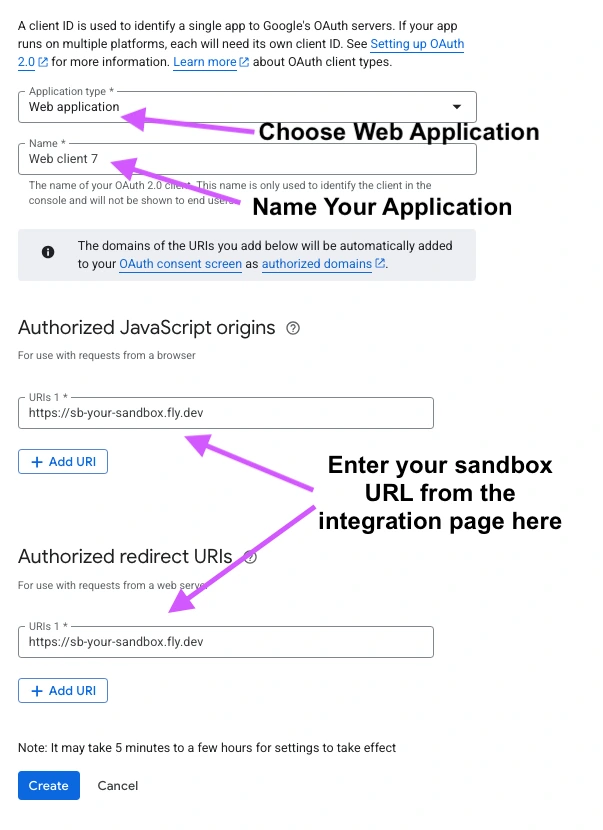
4 - Choose Web application as the application type, name the application and enter the URL shown on the Google Auth connection in Reflex Build as an Authorized JavaScript origin.
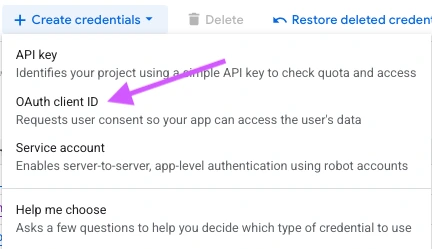
5 - Click Create, then copy the generated Client ID (GOOGLE_CLIENT_ID) and Client Secret (GOOGLE_CLIENT_SECRET). Store the secret somewhere safe: Google only shows it in full when the client is created.
Step 2: Configure the Integration in Your App
- In Reflex Build, open the Integrations tab and select your existing Google Auth connection.
- Enter your Client ID in GOOGLE_CLIENT_ID and your Client Secret in GOOGLE_CLIENT_SECRET.
- Click Save Changes.
Step 3: Notes
- The integration supports multiple environments (development, staging, production). Use environment-specific secrets for the client ID and secret.
- Google Auth handles token refresh automatically when users log in via OAuth.
- Users will see a standard Google login screen, ensuring familiarity and trust.
- Ensure every address your app is served from is an authorized JavaScript origin; otherwise, authentication will fail.