Databricks Integration
The Databricks Integration allows your app to connect to Databricks for secure data access, querying, and analytics. Once connected, you can run SQL queries, retrieve results, and power data-driven workflows directly from your app.
What You Can Do
With Databricks, your app can:
- Connect securely to your Databricks workspace.
- Run SQL queries or fetch data programmatically.
- Build dashboards and data visualizations on top of your Databricks tables.
- Automate workflows triggered by new or updated data.
- Combine Databricks with AI models for advanced analytics.
Step 1: Get Your Databricks Credentials
1 - Log in to your Databricks Workspace.
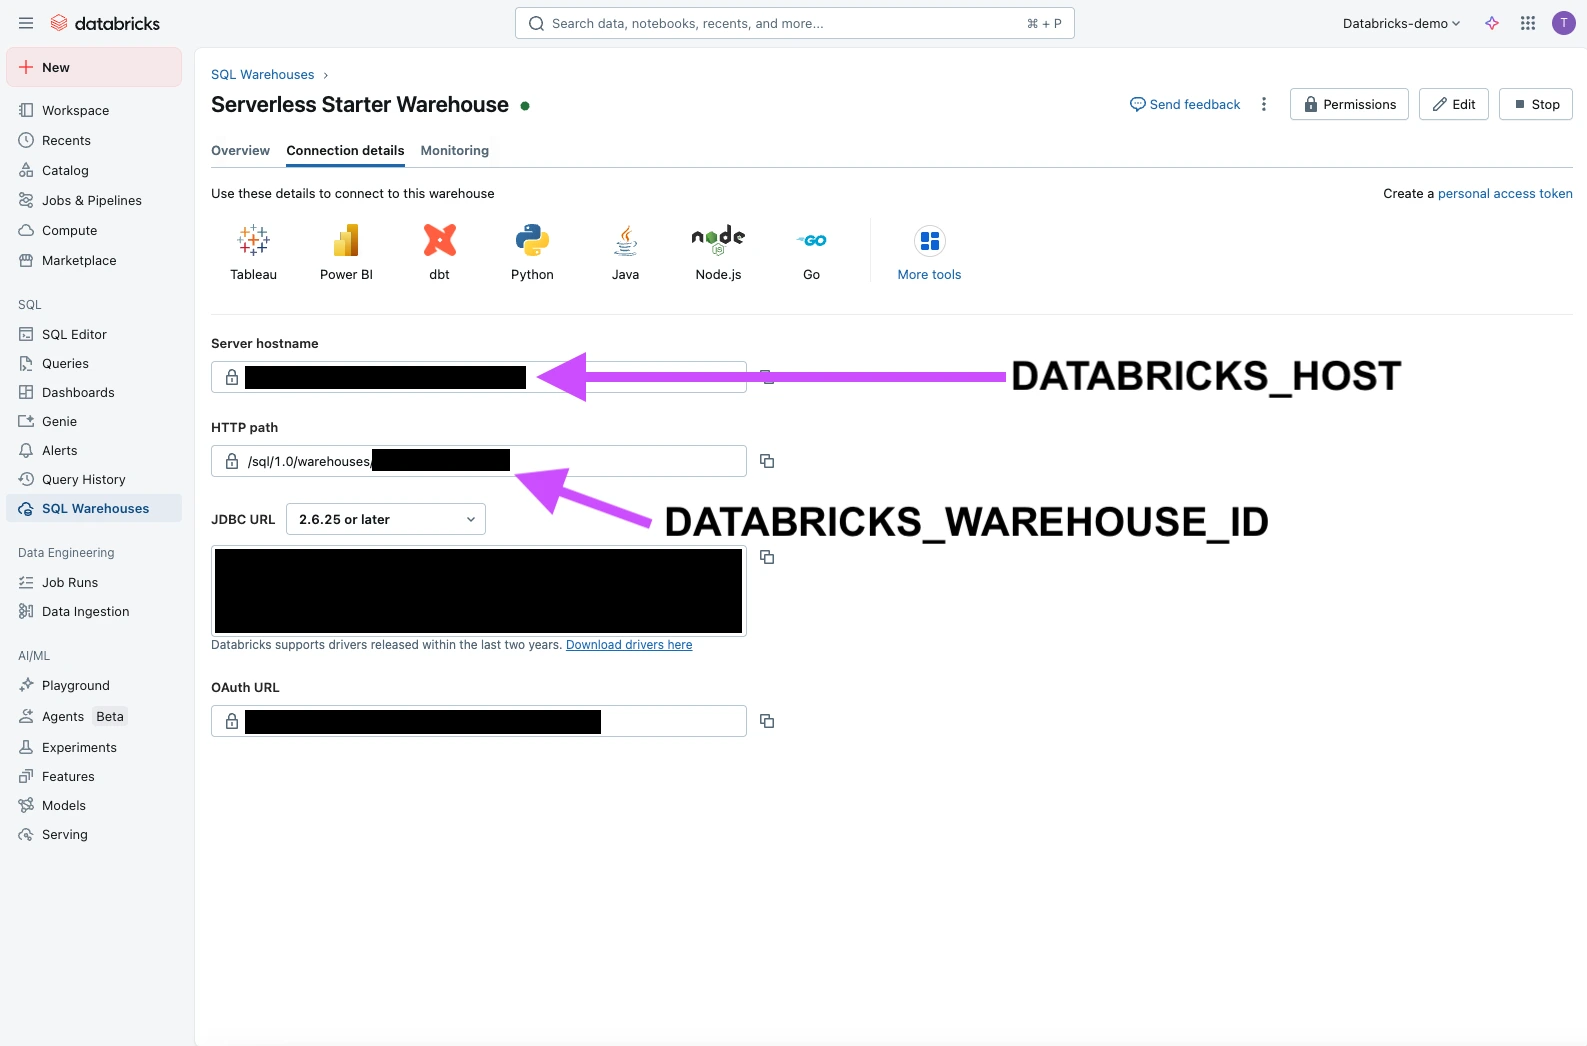
2 - Get your DATABRICKS_HOST and DATABRICKS_WAREHOUSE_ID:
- Go to
SQL Warehousesfrom the sidebar. - Select your desired warehouse.
- Click
Connection details. - Copy the Server hostname (this is your DATABRICKS_HOST).
- Copy the HTTP path removing the
/sql/1.0/warehouses/prefix (this is your DATABRICKS_WAREHOUSE_ID).
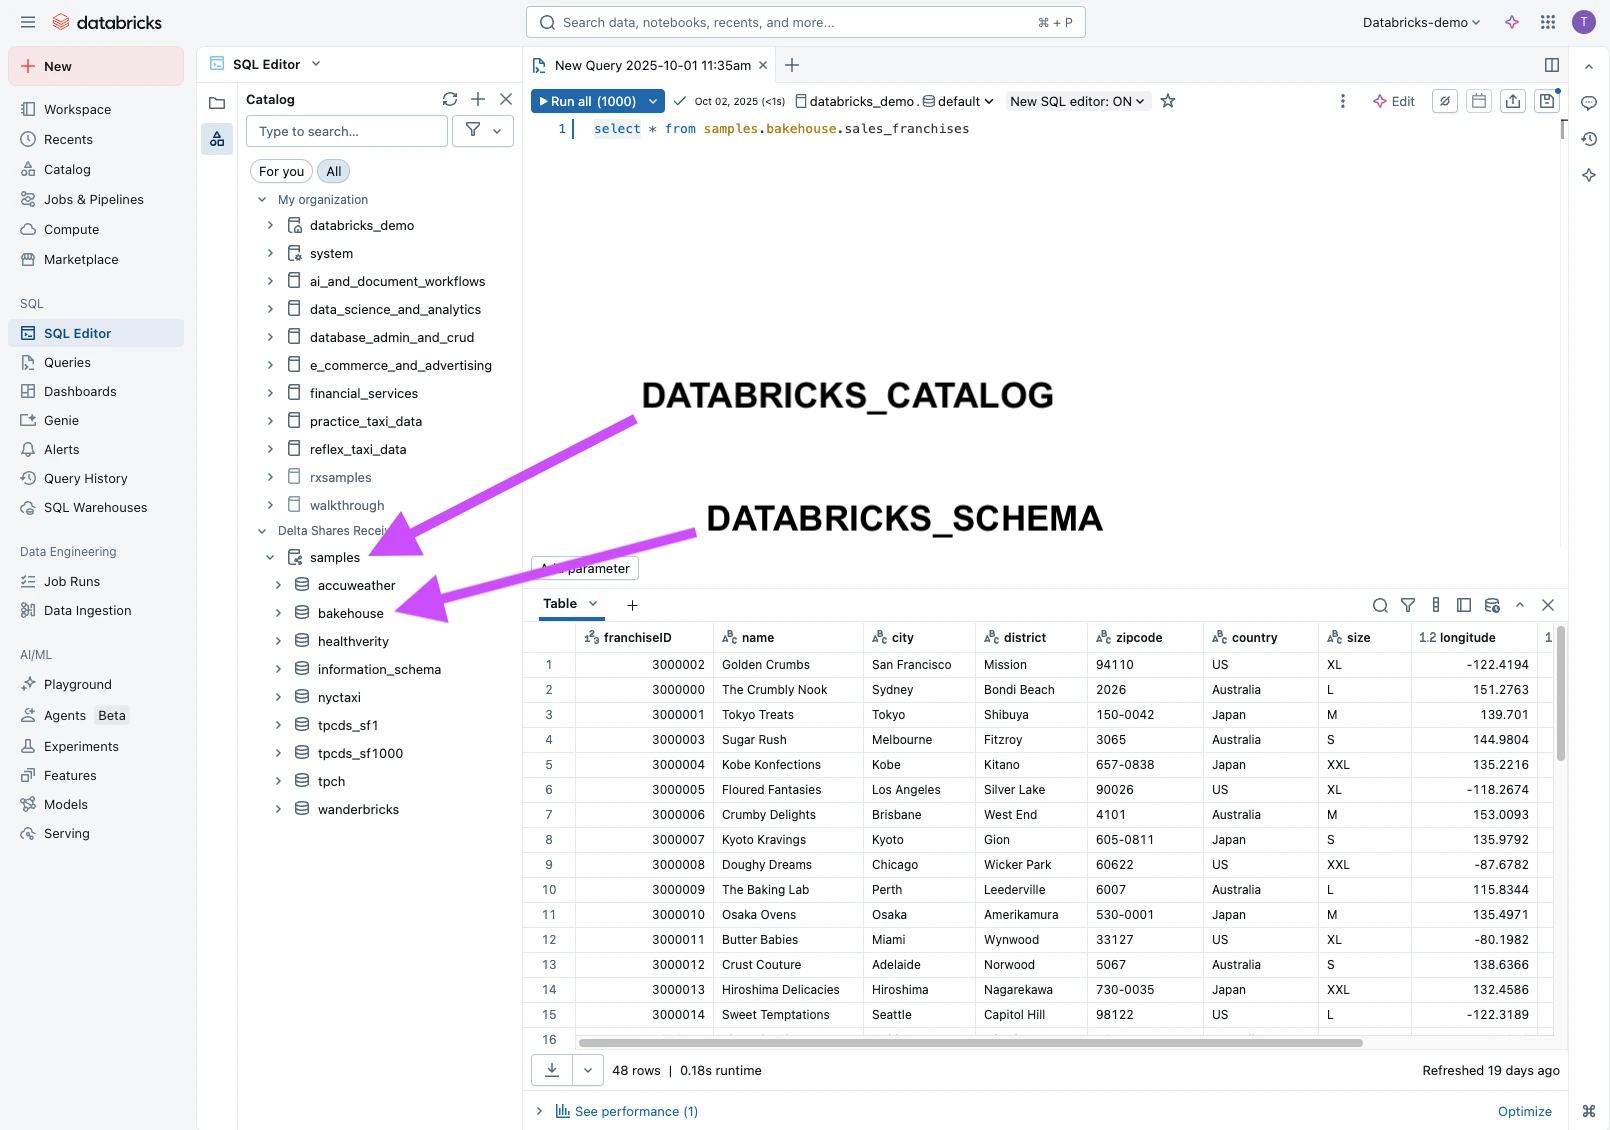
3 - Get your DATABRICKS_CATALOG and DATABRICKS_SCHEMA:
- Click the SQL Editor from the sidebar.
- Choose the DATABRICKS_CATALOG and DATABRICKS_SCHEMA from the dropdowns as shown below.
4 - Obtain your authentication credentials:
There are two methods to authenticate your app with Databricks: using interactive U2M OAuth or via registered M2M Service Principal. Choose one of the methods below to obtain the necessary credentials.
Interactive Login with your Databricks Account
If your workspace administrator has already added Reflex as a Connected App in your Databricks workspace, you should see a "Login with Databricks" button after entering your DATABRICKS_HOST.
Step 2: Configure the Integration in Your App
- In your app, go to Integrations and Add Databricks.
- Paste your DATABRICKS_HOST
- Select your authentication method:
- OAuth, if configured.
- Service Principal, provide the client ID and secret gathered previously.
- Paste or select your
- DATABRICKS_WAREHOUSE_ID
- DATABRICKS_CATALOG
- DATABRICKS_SCHEMA
- Click Connect to validate and save your integration.
Once connected, the AI Builder can execute queries directly against your Databricks environment.
Step 3: Notes
- Secure your token: Never expose tokens in public code.
- Permissions: Ensure your token or service account has the required workspace and table permissions.
- Combine with AI: Use query outputs to power models, summaries, or alerts in real time.
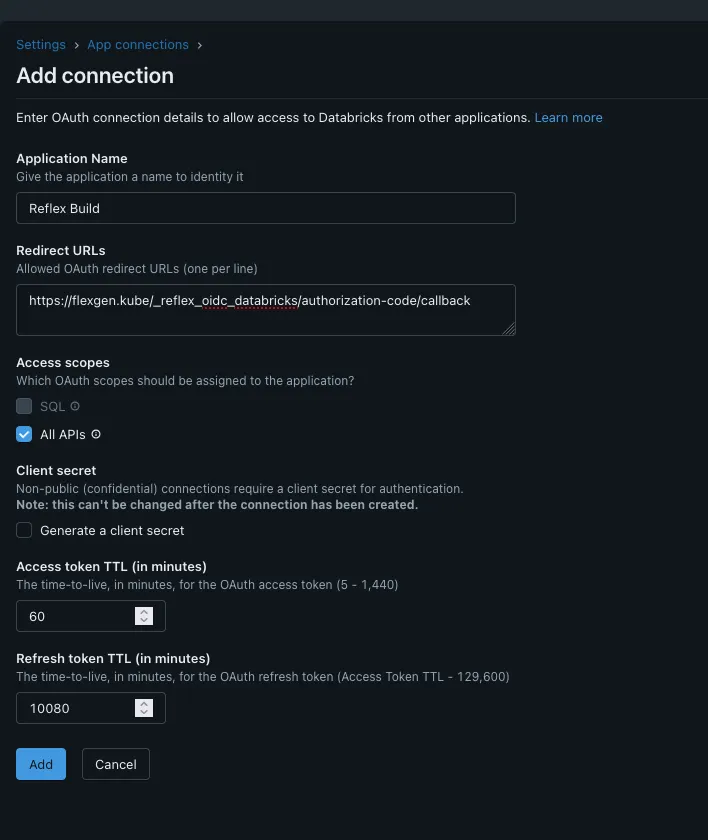
How to Enable Login as an Admin
- Login to Databricks
- Go to manage account

- Go to Settings → Apps Connections → Add new connection

- Give it a name, enter the redirect URL that Reflex Build provides, Click
All APIsand uncheckGenerate a client secretand then add. - URL:
https://build.reflex.dev/_reflex_oidc_databricks/authorization-code/callback