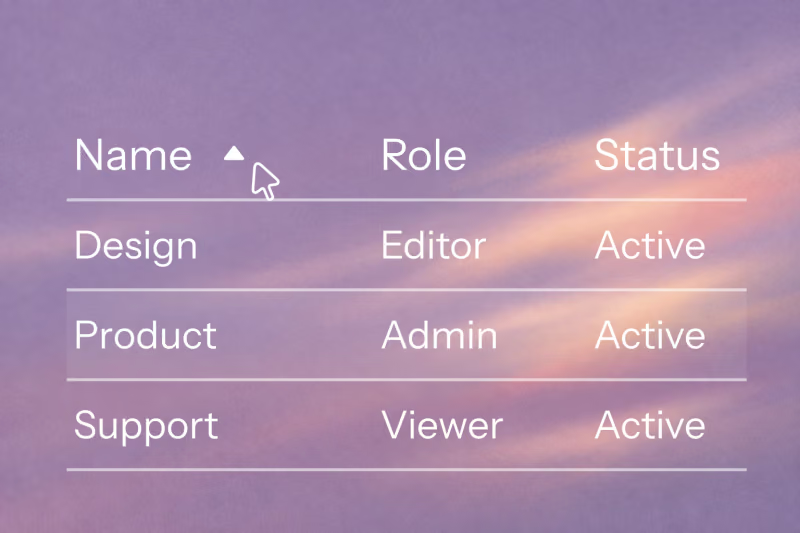
Explore the main uses of Reflex's Table component with a database. Build CRUD apps, data dashboards, and admin panels with Python-native tables.
The table component is one of the most useful components for visualizing, editing and working with data. In Reflex we have a built in rx.table component. This table efficiently displays data and allows embedding of various Reflex components, such as buttons, dropdowns, checkboxes, or forms, directly within table cells.
In this blog we will link the data in our rx.table to an external database. The live version of the app we create in this blog can be found here: https://customer-data-app.reflex.run. The first thing that it is necessary to understand are Tables.
Now that we have our database created it is necessary to load our data from the database. The load_entries event handler in State does a database query and returns all the data in the database to the State variable self.users.
classState(rx.State):
"""The app state."""
users: list[Customer] = []
current_user: Customer = Customer()
defload_entries(self) -> list[Customer]:
"""Get all users from the database."""with rx.session() as session:
query = select(Customer)
self.users = session.exec(query).all()
The show_customer function takes in a user and renders it in a rx.table.row. All the attributes of the Customer class are rendered out as rx.table.cell components in the row. The user.status uses an rx.match to handle multiple conditions and their corresponding components. Learn more about rx.match in the conditional rendering documentation. The status_badge function takes in a status and renders it out in an rx.badge.
defshow_customer(user: Customer):
"""Show a customer in a table row."""return rx.table.row(
rx.table.cell(user.name),
rx.table.cell(user.email),
rx.table.cell(user.phone),
rx.table.cell(user.address),
rx.table.cell(user.payments),
rx.table.cell(user.date),
rx.table.cell(
rx.match(
user.status,
("Delivered", status_badge("Delivered")),
("Pending", status_badge("Pending")),
("Cancelled", status_badge("Cancelled")),
status_badge("Pending")
)
),
)
The main_table function renders an rx.table component. The _header_cell function renders a text and an icon in an rx.table.column_header_cell. This renders out the names of the Customer model fields as the titles of the table columns.
The State.users var is iterated through using rx.foreach in this code rx.table.body(rx.foreach(State.users, show_customer)). The show_customer function is used to render each item in the State.users var.
Lastly the State.load_entries event handler is called when the rx.table is rendered using the on_mount event trigger.
## Adding a New Customer


Next let's explore how to add a user to our database and therefore to our table. We have a function `add_customer_button`, which is a UI element that is rendered in the `main_table` function defined in the section above.

In this `add_customer_button` function there is an `rx.dialog` which opens when the `rx.button` "Add New Customer" is pressed.

When the dialog is opened there is an `rx.form.root` with several `form_field` functions called inside. The `form_field` function returns an `rx.form.field`. It takes in several arguments, but most importantly takes in a `name` argument. The `name` prop is needed to submit with its owning form as part of a name/value pair. The content typed into the `rx.input` is submitted as the `value` in that name/value pair when the `rx.form` is submitted.

The same is done for the `rx.radio` component, where the `name` is set and the radio item selected is passed as the `value` when the `rx.form` is submitted.

To submit the `rx.form` with all the name/value pairs added, the "Submit Customer" button is pressed which is inside of an `rx.dialog.close` and an `rx.form.submit`, so it closes the dialog and it submits the form.
When the form is submitted it runs the code `on_submit=State.add_customer_to_db`, running the event handler `add_customer_to_db`. This event handler sets the `State` var `current_user` to equal the form data just submitted in the `rx.form`, as a type `Customer`.

This event handler also does a database query to add the current `self.current_user`, which we just set to be the form response, to the database.

Calling `session.refresh` after the submit ensures that the local model gets updated with the inserted ID (in more advanced cases, if any fields are lazy loaded, it would also fetch those so the object is less dependent on the active session and can be serialized).

Before this a check is done to see if the `email` the user has added is already an `email` in the database, and if it is then an `rx.window_alert` is thrown.
class State(rx.State): """The app state."""
users: list[Customer] = []
current_user: Customer = Customer()

...

def add_customer_to_db(self, form_data):
    """Add a customer to the database."""
    form_data["date"] = datetime.now().strftime("%Y-%m-%d %H:%M:%S")
    with rx.session() as session:
        if session.exec(
            select(Customer).where(Customer.email == self.current_user["email"])
        ).first():
            return rx.window_alert("User with this email already exists")
        self.current_user = Customer(**form_data)
        session.add(self.current_user)
        session.commit()
        session.refresh(self.current_user)
    self.load_entries()
    return rx.window_alert(f"User \{self.current_user["name"]} has been added.")
Finally once the new user is added to the database, the `load_entries` event handler is run again which loads all the data from the database and fills the table.


```md alert
# Full Code
class State(rx.State): """The app state."""
users: list[Customer] = []
current_user: Customer = Customer()

...

def add_customer_to_db(self, form_data):
    """Add a customer to the database."""
    form_data["date"] = datetime.now().strftime("%Y-%m-%d %H:%M:%S")
    with rx.session() as session:
        if session.exec(
            select(Customer).where(Customer.email == self.current_user["email"])
        ).first():
            return rx.window_alert("User with this email already exists")
        self.current_user = Customer(**form_data)
        session.add(self.current_user)
        session.commit()
        session.refresh(self.current_user)
    self.load_entries()
    return rx.window_alert(f"User \{self.current_user["name"]} has been added.")
## Updating and Deleting a Customer

### Updating

Let's now explore how to update and delete customers from our table. To update a customer is very similar to adding a customer. We have a function `update_customer_dialog`, which is a UI element that is rendered in the `show_customer` function.

In this `update_customer_dialog` function there is an `rx.dialog` which opens when the `rx.button` "Edit" is pressed. In addition to opening the `rx.dialog`, the `on_click=lambda: State.get_user(user)` runs the event handler `get_user` which sets the `self.current_user` as the `user` clicked on.

You might be wondering how the `user` is actually being passed through to be edited. All our users are in our state var `users`. This is being passed to `rx.table.body(rx.foreach(State.users, show_customer))` in the `main_table` function. So the `show_customer` function is taking in each `user` separately and it renders an edit button for each user from the code `update_customer_dialog(user)` in `show_customer` (Check the full code example below to follow this).

The rest of the `update_customer_dialog` function is the same as the `add_customer_button`, except that now we also pass through a `default_value` to the `form_field`, such as `user.email` in the example code below. This shows the current value for that user that we are now able to edit.
The `update_customer_to_db` event handler is run when the form is submitted which updates the `self.current_user` and updates that user in the database.
class State(rx.State): """The app state."""
users: list[Customer] = []
current_user: Customer = Customer()
...
def update_customer_to_db(self, form_data: dict):
self.current_user.update(form_data)
with rx.session() as session:
customer = session.exec(
select(Customer).where(Customer.id == self.current_user["id"])
).first()
for field in Customer.get_fields():
if field != "id":
setattr(customer, field, self.current_user[field])
session.add(customer)
session.commit()
self.load_entries()
return rx.window_alert(f"User \{self.current_user["name"]} has been modified.")
### Deleting
To delete a customer from our table there is a button in `show_customer` where `on_click=lambda: State.delete_customer(getattr(user, "id"))`. This runs the event handler `delete_customer`, which takes in an `id` from the `user`, queries this `id` in the database and then deletes the user from the database.
class State(rx.State): """The app state."""
users: list[Customer] = []
current_user: Customer = Customer()
...
def delete_customer(self, id: int):
"""Delete a customer from the database."""
with rx.session() as session:
customer = session.exec(select(Customer).where(Customer.id == id)).first()
session.delete(customer)
session.commit()
self.load_entries()
return rx.window_alert(f"User \{self.current_user["name"]} has been deleted.")
def show_customer(user: Customer): """Show a customer in a table row."""
users: list[Customer] = []
current_user: Customer = Customer()

...

def get_user(self, user: Customer):
    self.current_user = user
def update_customer_to_db(self, form_data: dict):
self.current_user.update(form_data)
with rx.session() as session:
customer = session.exec(
select(Customer).where(Customer.id == self.current_user["id"])
).first()
for field in Customer.get_fields():
if field != "id":
setattr(customer, field, self.current_user[field])
session.add(customer)
session.commit()
self.load_entries()
return rx.window_alert(f"User \{self.current_user["name"]} has been modified.")
def delete_customer(self, id: int):
"""Delete a customer from the database."""
with rx.session() as session:
customer = session.exec(select(Customer).where(Customer.id == id)).first()
session.delete(customer)
session.commit()
self.load_entries()
return rx.window_alert(f"User \{self.current_user["name"]} has been deleted.")
## Sorting and Filtering

Now that we are able to add, edit and delete data from our table, let's explore how to sort and filter this data as needed.

### Sorting

For sorting the `rx.select` component is used. The data is sorted based on the attributes of the `Customer` class. When a select item is selected, as the `on_change` event trigger is hooked up to the `sort_values` event handler, the data is sorted based on the state variable `sort_value` attribute selected. This works by setting the state var `sort_value` and then running `self.load_entries`.

The sorting query gets the `sort_column` based on the state variable `sort_value`. It gets the order using the `asc` function from sql and finally uses the `order_by` function. If the `sort_value` is not `payments`, as this is a `float` type, then the items in the sort column are also put to lower case using `func.lower`, so capitalisation of words will not affect the sorting.
from sqlmodel import select, asc, or_, func, cast, String
class State(rx.State): """The app state."""
users: list[Customer] = []
sort_value: str = ""


def load_entries(self) -> list[Customer]:
    """Get all users from the database."""
    with rx.session() as session:
        query = select(Customer)

        if self.sort_value:
            sort_column = getattr(Customer, self.sort_value)
            if self.sort_value == "payments":
                order = asc(sort_column)
            else:
                order = asc(func.lower(sort_column))
            query = query.order_by(order)

        self.users = session.exec(query).all()

def sort_values(self, sort_value: str):
    self.sort_value = sort_value
    self.load_entries()
### Filtering

For filtering the `rx.input` component is used. The data is filtered based on the search query entered into the `rx.input` component. When a search query is entered, as the `on_change` event trigger is hooked up to the `filter_values` event handler, the data is filtered based on if the state variable `search_value` is present in any of the data in that specific `Customer`.

The `filter_values` event handler sets the state var `search_value` and then runs `self.load_entries`.

In the `self.load_entries` event handler the `%` character before and after `search_value` makes it a wildcard pattern that matches any sequence of characters before or after the `search_value`. `query.where(...)` modifies the existing query to include a filtering condition. The `or_` operator is a logical OR operator that combines multiple conditions. The query will return results that match any of these conditions dynamically generated by iterating over the fields returned by `Customer.get_fields()`, excluding the `id` and `payments` fields.

The output for the `name` field is `Customer.name.ilike(search_value)`, which checks if the `name` column of the `Customer` table matches the `search_value` pattern in a case-insensitive manner (`ilike` stands for "case-insensitive like").

Additionally, the `payments` field, which is not included in the initial list, is explicitly cast to a string before the `ilike` operator is applied, ensuring it can be correctly compared in a case-insensitive manner.
from sqlmodel import select, asc, or_, func, cast, String
class State(rx.State): """The app state."""
users: list[Customer] = []
search_value: str = ""

def load_entries(self) -> list[Customer]:
    """Get all users from the database."""
    with rx.session() as session:
        query = select(Customer)
        if self.search_value:
            search_value = f"%\{str(self.search_value).lower()}%"
            query = query.where(
                or_(
                    *[
                        getattr(Customer, field).ilike(search_value)
                        for field in Customer.get_fields()
                        if field not in ["id", "payments"]
                    ],
                    # ensures that payments is cast to a string before applying the ilike operator
                    cast(Customer.payments, String).ilike(search_value)
                )
            )

        self.users = session.exec(query).all()


def filter_values(self, search_value):
    self.search_value = search_value
    self.load_entries()
from sqlmodel import select, asc, or_, func, cast, String
class State(rx.State): """The app state."""
users: list[Customer] = []
sort_value: str = ""
search_value: str = ""


def load_entries(self) -> list[Customer]:
    """Get all users from the database."""
    with rx.session() as session:
        query = select(Customer)
        if self.search_value:
            search_value = f"%\{str(self.search_value).lower()}%"
            query = query.where(
                or_(
                    *[
                        getattr(Customer, field).ilike(search_value)
                        for field in Customer.get_fields()
                        if field not in ["id", "payments"]
                    ],
                    # ensures that payments is cast to a string before applying the ilike operator
                    cast(Customer.payments, String).ilike(search_value)
                )
            )

        if self.sort_value:
            sort_column = getattr(Customer, self.sort_value)
            if self.sort_value == "payments":
                order = asc(sort_column)
            else:
                order = asc(func.lower(sort_column))
            query = query.order_by(order)

        self.users = session.exec(query).all()


def sort_values(self, sort_value: str):
    self.sort_value = sort_value
    self.load_entries()

def filter_values(self, search_value):
    self.search_value = search_value
    self.load_entries()
## Conclusion

And that is it. We have set up our table in a database, learnt how to add, edit and delete users, and finally how to sort and filter them. This is just a basic use case for the `rx.table` and there are many more advanced use cases like setting up Machine Learning job workflows etc.

The live app can be found here: https://customer-data-app.reflex.run and the full code can be found here: https://github.com/reflex-dev/reflex-examples/tree/main/customer_data_app.